Lead Form Extensions are a new type of extension which if successful should help you get more leads and potential customers.
For now, these are only available on mobile and tablet devices. This new extension shortens your potential customer’s path.
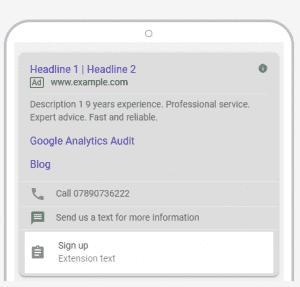
How do they work?
Well, any time that a lead form extension is opened, Google will track that as a click, just like Google would track a click on an ad.Then once a customer submits their information into the lead form, Google will then count that as a conversion. A key benefit of lead form extensions is that they could help companies generate more leads straight from their search ads, to encourage to become new customers.
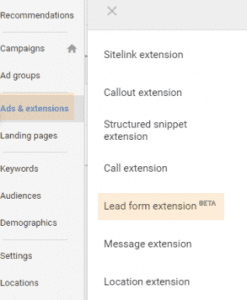
How to set up a lead form?
So now your probably wondering how you set one of these up?
First, you will need your Google Ads open which you can open here if you want to follow step by step.
Start by clicking Ads & Extensions > Extensions > Blue plus button > From the drop-down menu select Lead Form Extension.
A lead extension form set up consists of three main sections; We are going to break each section down.
- Create your extension
- Create your lead form
- Create a form submission message
Free Google Ads Audit
TRANSFORM YOUR AD PERFORMANCE TODAY!
3 tailored high-impact recommendations. No obligation. Free of charge.
Your Extension
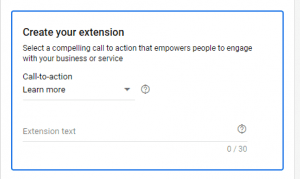
First, to create your extension you will need to choose the call-to-action that is specific to your adverts goal.
The call-to-actions which are available to use are:
- Learn More
- Get Quote
- Apply Now
- Sign Up
- Contact Us
- Subscribe
- Download
- Book Now
- Get Offer
Once picked, you will then need to enter the extension text you want to appear, which can be up to 30 characters. The text entered and call-to-action will show beneath the ad in the search results
Create Your Lead Form
The next stage of creating your new extension is creating your lead form, which you will see once the customer clicks on the call-to-action.
This is an important part of the extension as this is what the customer will see when clicking the call-to-action. Make sure to fill in the following sections of the form:
- Headline (up to 30 characters)
- Business Name (up to 25 characters)
- Description (up to 200 characters)
After that’s completed, select the boxes of information you want to include to ask the potential customer. The following are currently available:
- Name
- Phone Number
- Postal Code
You will also need to add a link to your business privacy policy. Finally, you can choose to upload a background image if wanted (1200×628 is the prefered size).
Free Google Ads Audit
TRANSFORM YOUR AD PERFORMANCE TODAY!
3 tailored high-impact recommendations. No obligation. Free of charge.
Create A Form Submission Message
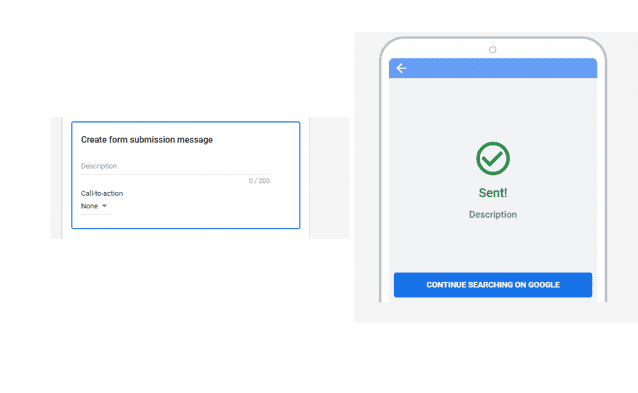
The final stage is to create the thank you message that customers will see after submitting the form, it’s best to let them know what to expect next here.
To help you do this you can:
- Add a description – up to 200 characters
- Choose a call-to-action; currently, you can select between “None”, “Visit Website” or “Download.”
Once you have selected your call-to-action, press save.
Voila, your first lead form extension is completed, give yourself a pat on the back and watch the leads come in.
Make Downloading Your Leads Easier
Now for those of you with a CRM, make downloading your leads easier from your lead form extensions.
By downloading them from Google Ads, using webhooks to pull them into your CRM.
To set this up, all you will need is a webhook URL and key to your lead form extension.
First, navigate to the lead form extensions as shown above. Once the details are filled in, choose to manage your lead form with a webhook.
For more detailed instructions on how to do this, follow Googles instructions here.
To Summarise
Going into 2020, we expect more lead form extensions being used, whether or not they will have an impact on the number of leads depends on whether you offer something of value to entice your potential customers. As we roll these out, we look forward to seeing what impact these have.
Get In Touch Today
Find out how our digital marketing services can help your business grow!
Enter your details to receive a call back from us.


